- Published 30 Apr 2024
- Last Modified 30 Apr 2024
- 6 min
A Comprehensive Guide to Rheostats
Our rheostats guide explains their uses, how they work, the different types & how they differ from potentiometers.

What is a Rheostat?

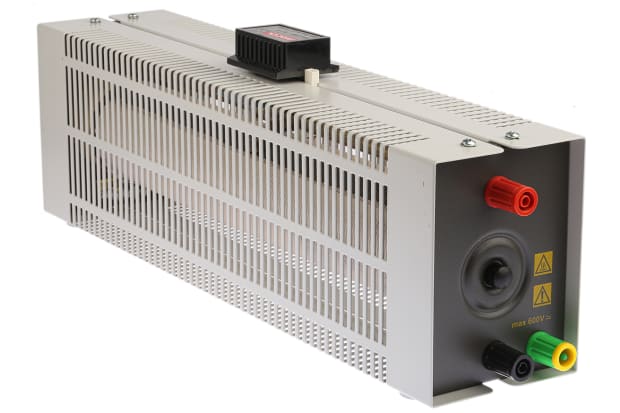
A rheostat, also known as a variable resistor, is an electrical component used to regulate the flow of current in a circuit. Unlike a fixed resistor, a rheostat allows the user to manually adjust the resistance, which in turn controls the amount of current passing through the circuit. Rheostats are commonly used in a wide range of electronic and electrical applications, from controlling the brightness of lights to adjusting the speed of motors. In this guide, we'll explore the different types of rheostats, their applications, and how to use them effectively.
How Does a Rheostat Work?
The basic operation of a rheostat is relatively simple. A rheostat consists of a resistive element, typically a coiled wire or a carbon film, and a sliding contact, also known as a wiper, that moves along the resistive element. The resistive element is connected in series with the circuit, and the current passing through the circuit must also pass through the resistive element of the rheostat.
By adjusting the position of the sliding contact, the effective length of the resistive element through which the current must pass changes. This, in turn, alters the amount of resistance in the circuit. When the sliding contact is moved to increase the length of the resistive element, the resistance in the circuit increases, reducing the current. Conversely, when the sliding contact is moved to decrease the length of the resistive element, the resistance decreases, allowing more current to flow through the circuit.
The sliding contact is typically controlled by a knob or lever, allowing the user to precisely adjust the resistance and, as a result, the current in the circuit. This simple yet effective mechanism forms the basis of how a rheostat works.
Types of Rheostats
Rheostats come in various types, each designed for specific applications. The primary types of rheostats include linear rheostats, rotary rheostats, and plug-in rheostats. Each type has its own unique design and characteristics that make it well-suited for particular applications.
Linear Rheostats
Linear rheostats, often referred to as slide rheostats or sliding rheostats, are a type of variable resistor in which the sliding contact is moved along a straight resistive element. The linear motion of the sliding contact gives this type of rheostat its name. Linear rheostats are commonly used in applications where a straightforward, linear adjustment of resistance is required.
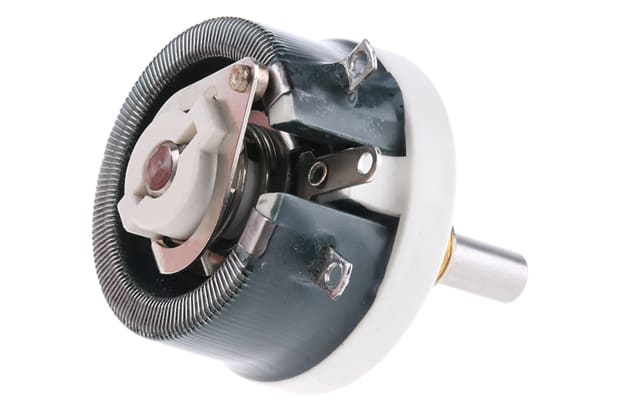
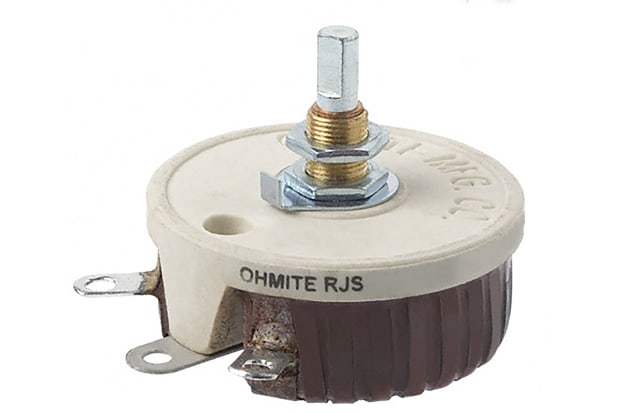
Rotary Rheostats
Rotary rheostats, as the name suggests, feature a rotary or circular resistive element. The sliding contact is controlled by a knob or dial that the user can turn, allowing for smooth and continuous adjustment of the resistance. Rotary rheostats are often used in applications that require precise control, such as in audio equipment or lighting dimmer switches.
Plug-In Rheostats
Plug-in rheostats are a type of external rheostat switch that can be attached to certain appliances or circuits as an aftermarket addition. The aim is usually to give a device a range of adjustable power settings when it does not have this function built into its core circuitry. Common examples include lamps, fans, and blowers. Plug-in rheostats are often sold as plug-in dimmers, even when they are intended for functions other than adjusting a light source.
Common Applications of Rheostats
Rheostats are used in a wide range of applications across various industries. Their ability to control the flow of current makes them invaluable in situations where precise adjustments are needed. Some of the most common applications of rheostats include:
Light Dimming
One of the most well-known applications of rheostats is in the dimming of lights. By adjusting the resistance in the circuit, a rheostat can control the amount of current flowing to a light fixture, resulting in the ability to dim the light. This is often used in settings where different lighting levels are required, such as in theatres, restaurants, or homes.
Fan Speed Control
Rheostats are commonly used to control the speed of fans. By adjusting the resistance in the fan's circuit, a rheostat can regulate the amount of current, which in turn alters the fan's speed. This is useful in maintaining comfortable conditions in spaces like offices, homes, and industrial facilities.
Motor Speed Control
Rheostats can also be used to control the speed of motors. By adjusting the resistance in the motor's circuit, a rheostat can regulate the current, affecting the motor's speed. This is valuable in applications where precise control is needed, such as conveyor belts, industrial machinery, and automation systems.
Heating Control
Rheostats are often used in heating elements to control temperature. By adjusting the resistance in the circuit, a rheostat can regulate the amount of current, which directly impacts the heat generated. This is commonly used in electric stoves, ovens, and other heating appliances.
How to Use a Rheostat
Using a rheostat is relatively straightforward, but it's essential to follow some basic steps to ensure safe and effective operation. Here's a simple guide on how to use a rheostat in your circuit:
Step 1: Circuit Preparation
Begin by preparing your electrical circuit. Ensure that the power to the circuit is turned off to prevent any electrical shocks or short circuits.
Step 2: Identify the Load
Identify the component in your circuit that you want to control, such as a light fixture, a fan, or a motor. This component is often referred to as the load.
Step 3: Connect the Rheostat
Determine where in the circuit you want to place the rheostat. Typically, the rheostat is connected in series with the load. This means that the current flows from the power source, through the rheostat, to the load, and then back to the power source.
Make sure to connect the wires properly, following the manufacturer's instructions. Most rheostats will have three terminals: two for the circuit and one for the load.
Step 4: Adjust the Rheostat
Once the rheostat is properly connected, you can turn on the circuit. You'll notice that the load, whether it's a light, a fan, or a motor, will be operating at full capacity.
By turning the knob or lever on the rheostat, you can start to adjust the resistance in the circuit. As you do this, you'll see the effect on the load. For example, if you're controlling a light, you'll notice that the light dims as you increase the resistance.
Step 5: Safety Considerations
Always be aware of safety considerations when using rheostats. Make sure the rheostat is installed in a location where it can be easily accessed in case of an emergency. Regularly inspect the rheostat and the connected circuit for any signs of damage or wear, and replace any components as needed.
Remember to turn off the power to the circuit before making any adjustments to the wiring or the rheostat itself. This will help prevent electrical accidents.
Popular Brands