- Published 9 Apr 2024
- Last Modified 9 Apr 2024
- 7 min
SATA Cables – A Complete Guide in New Zealand
Our SATA cables guide explains all you need to know about the different types and which is best for your task.

What are SATA Cables?
SATA cables, or Serial Advanced Technology Attachment cables, are essential components in the world of computing. These cables are used to connect storage devices like hard drives, solid-state drives, and optical drives to a computer’s motherboard.
SATA cables come in various lengths and designs, but they all serve the same fundamental purpose of facilitating data transfer between storage devices and the rest of the computer system.
In this article, we’ll explore the different types of SATA cables, their applications, and provide guidance on how to choose the right SATA cable for your specific needs.
SATA Cable Types and Connectors
SATA cables come in a variety of types and connector configurations. The most common types of SATA cables are the standard SATA data cable and the SATA power cable.
Standard SATA Data Cables
Standard SATA data cables are used to transfer data between a storage device and the motherboard. These cables typically feature a 7-pin connector design and are available in different lengths to accommodate various PC configurations.
Standard SATA data cables are essential for connecting internal storage devices like hard drives and solid-state drives to your computer.
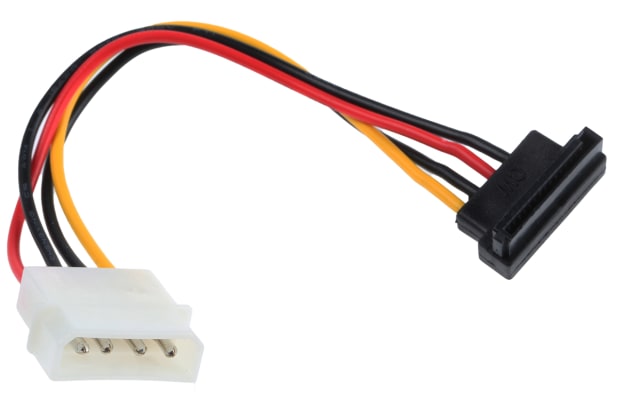
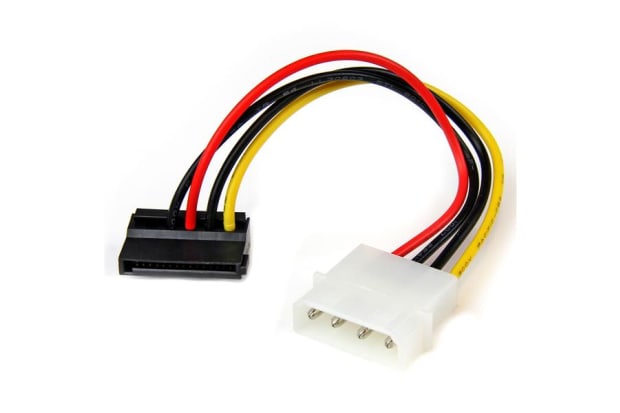
Standard SATA Power Cables
SATA power cables are used to supply power to SATA compatible devices. These cables typically feature a 15-pin connector on one end and one or more 4-pin Molex connectors on the other end.
SATA power cables are used in conjunction with standard SATA data cables to provide both power and data connections to internal storage devices.
Other Types of SATA Cables
In addition to standard SATA data and power cables, there are several other specialised types of SATA cables that are used in more specific applications.
e-SATA cables, for example, are designed for connecting external SATA devices to a computer, while low profile SATA cables are used in scenarios where space is limited.
SATA to USB cables and adaptors are also available for connecting SATA devices to USB ports, making them useful for data transfer applications.
How do SATA Cables Work?
SATA cables work by establishing a connection between a storage device and a computer’s motherboard. The 7-pin connector on a standard SATA data cable, for example, is designed to fit into the SATA port on a storage device or motherboard.
Once connected, the SATA cable enables the transfer of data between the storage device and the rest of the computer system.
The 15-pin connector on a standard SATA power cable similarly connects to the power input on a storage device, providing the necessary electrical power for the device to operate.
Together, these cables ensure that storage devices can communicate with the rest of the computer system and receive the power they need to function properly.
How to Install a SATA Cable
Installing a SATA cable is a relatively straightforward process, but it’s important to follow the correct steps to ensure that the cable is installed safely and securely.
Installing a Standard SATA Data Cable
To install a standard SATA data cable, follow these steps:
Step 1: Identify the SATA Ports
Identify the SATA ports on your storage device and motherboard. SATA ports on a motherboard are typically located near the bottom edge, while on storage devices they are usually located on the back of the device.
Step 2: Connect the Cable
Connect one end of the SATA data cable to the SATA port on your storage device, and the other end to the SATA port on your motherboard.
Ensure that the L-shaped notch on the SATA data cable connector aligns with the L-shaped tab on the SATA port, and that the connector is inserted in the correct orientation.
General Safety Tips
Whether you are installing a standard SATA data cable or a standard SATA power cable, there are a few general safety tips to keep in mind.
Always ensure that your computer is powered off and unplugged before installing or modifying any cables. This will help to prevent electrical shock or damage to your components.
Be gentle when handling the cables and connectors, and avoid bending them beyond their recommended bend radius.
Finally, take your time to route the cables neatly and securely, ensuring that they do not interfere with any fans, moving parts, or other components.
Which SATA Cable to Use
The type of SATA cable you should use depends on your specific needs and the devices you are connecting. Here are a few key considerations to keep in mind when choosing the right SATA cable:
Internal vs External
If you are connecting internal storage devices within your computer case, you will need standard SATA data and power cables.
For external connections to devices like external hard drives or optical drives, you may need to use e-SATA cables or SATA to USB cables, depending on the interface of the external device.
Compatibility
Ensure that the SATA cable you choose is compatible with your devices. Most modern storage devices use standard SATA connectors, but it’s always a good idea to double check before making a purchase.
Cable Length
Consider the cable length required for your specific setup. Choose a cable length that allows you to make the necessary connections without excess slack or tension.
Quality and Brand
Opt for high-quality cables from reputable brands to ensure reliable performance. Well-made cables with proper shielding and connectors can help prevent data loss or interference.
By considering these factors, you can select the right SATA cable for your installation, whether it’s for adding internal storage to your PC or connecting external devices for data transfer.
SATA Cable FAQs
Key Brands for SATA Cables
StarTech
StarTech is a leading provider of connectivity solutions, including a wide selection of reliable SATA cables. Their products are known for quality and compatibility, making them a trusted choice for various tech enthusiasts and professionals.
Roline
Roline offers a comprehensive range of computer and network connectivity products, including SATA cables. Their cables are designed to meet industry standards and performance requirements, ensuring seamless data transfer and reliable connections.
Molex
Molex is a well-established brand in the electronics and connectivity industry, providing high-quality SATA cables and power solutions. Their products are engineered for durability and performance, making them a preferred option for demanding applications.
RS Pro
RS Pro is a trusted brand that delivers a wide range of reliable components and accessories, including SATA cables. Their commitment to quality and compliance with industry standards ensures that their cables are suitable for various IT and electronics projects.
By choosing SATA cables from these reputable brands, you can be confident in the performance, reliability, and compatibility of your connectivity solutions. Whether you’re building a custom PC, upgrading your storage configuration, or maintaining your computer systems, these brands offer the assurance of high-quality SATA cables for your specific needs.