- Published 30 Apr 2024
- Last Modified 30 Apr 2024
- 8 min
A Comprehensive Guide to Multifunction Testers for Electrical Safety Testing
Explore multifunction testers for a range of electrical measurements and safety tests. Consider key specifications and features to find the right tester for your requirements.

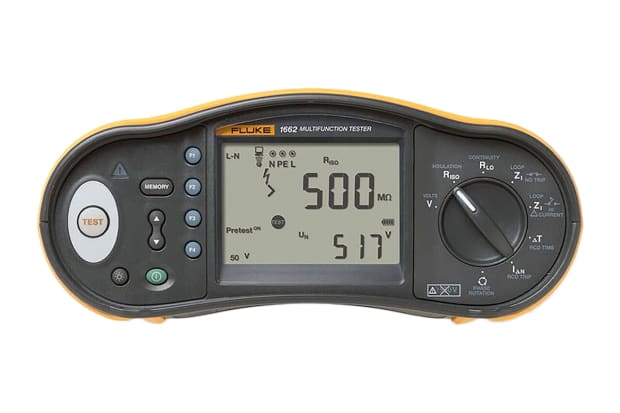
When it comes to ensuring electrical safety, multifunction testers are essential tools for electricians and technicians. These versatile devices are used to perform a wide range of electrical tests and measurements, making them invaluable for maintaining safety standards and compliance.
In this guide, we'll explore the world of multifunction testers, also known as MFTs, and help you understand what to look for when choosing the right one for your needs. Whether you're a seasoned professional or just getting started in the field, this article will provide you with the information you need to make an informed decision.
What is a Multifunction Tester?
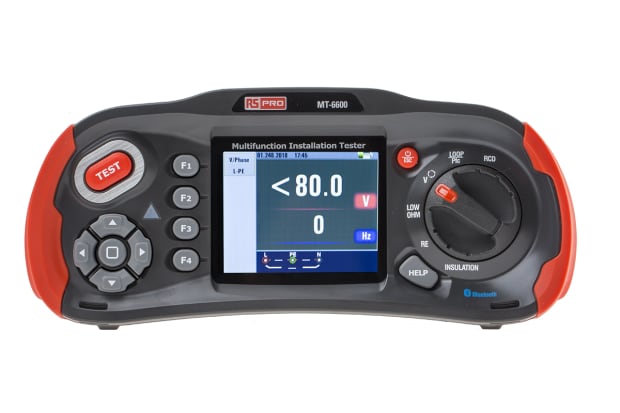
A multifunction tester is a specialised piece of equipment used by electricians and electrical technicians to carry out a variety of tests on electrical installations. These tests are essential for ensuring that electrical systems are operating safely and in compliance with relevant regulations and standards.
Multifunction testers are capable of performing a wide range of tests, including but not limited to:
- Insulation resistance testing
- Earth loop impedance testing
- RCD (residual current device) testing
- Continuity testing
- Voltage testing
- Phase sequence testing
- And more
These tests are crucial for identifying potential faults, measuring the performance of electrical circuits, and verifying that safety mechanisms are functioning as intended.
Types of Multifunction Testers
Multifunction testers come in a variety of types and models, each designed to meet specific needs and requirements. The three main categories of MFTs are:
- Domestic: These testers are designed for use in residential settings and are typically more straightforward in terms of functionality. They are well-suited for electricians who primarily work on domestic electrical installations.
- Commercial: Commercial multifunction testers are built to handle the demands of commercial and industrial electrical systems. They often offer more advanced features and capabilities, making them suitable for a wide range of applications.
- Industrial: Industrial MFTs are the most advanced type of multifunction tester, offering a wide range of features and capabilities for more complex electrical systems. They are typically used by highly skilled electricians and technicians working in industrial settings.
Key Features to Consider When Choosing a Multifunction Tester
Choosing the right multifunction tester is essential for ensuring that you have the tools you need to perform your work safely and effectively. Here are some key features to consider when evaluating different MFTs:
- Test Capabilities: Consider the specific tests that the MFT can perform, and ensure that it aligns with the types of tests you need to carry out in your work. Look for a tester that offers a comprehensive range of testing capabilities to cover all of your needs.
- Compliance with Standards: Make sure that the multifunction tester you choose is compliant with relevant electrical safety standards in New Zealand. This is essential for ensuring that your tests are accurate and that you are meeting the necessary regulatory requirements.
- Ease of Use: Look for a multifunction tester that is intuitive and easy to operate. A user-friendly interface and clear display can make a big difference in your ability to perform tests efficiently and accurately.
- Durability: Your MFT is likely to be used in a variety of different environments, some of which may be challenging. Look for a tester that is built to withstand the rigours of the job, with a durable construction that can handle the demands of regular use.
- Safety Features: Multifunction testers are used to work with electrical systems, so safety is a top priority. Look for testers with built-in safety features, such as insulated test leads and automatic discharge of capacitors, to minimise the risk of accidents or injuries.
- Data Management: Some modern multifunction testers offer features for data storage and transfer, allowing you to easily save and analyse test results. This can be valuable for maintaining records and documentation of your tests.
- Calibration and Support: Consider the calibration requirements of the MFT and the availability of support and service. Regular calibration is essential to ensure the accuracy of your tester, and having access to reliable support can be helpful if you encounter any issues.
Multifunction Testers vs Other Electrical Test Equipment
In addition to multifunction testers, there are other types of electrical test equipment that are commonly used by electricians and technicians. Here are a few examples:
Electrical Safety Testers
Electrical safety testers, also known as hipot testers or dielectric strength testers, are specialised instruments used to evaluate the safety and integrity of electrical devices and components. These testers are designed to ensure that electrical equipment complies with safety standards and regulations. They typically perform a range of measurements, including insulation resistance, ground continuity, and leakage current, to verify that electrical devices are safe for use.
Electrical Circuit Testers
Electrical circuit testers, often referred to as circuit analysers or outlet testers, are used to check the integrity and functionality of electrical circuits. These testers are typically used to identify wiring faults, detect open grounds, and verify proper wiring configurations. They are commonly used in both residential and commercial settings to troubleshoot electrical issues and ensure that circuits are operating as intended.
Electrical Voltage Testers
Electrical voltage testers, also known as voltage detectors or voltage probes, are simple tools used to determine the presence or absence of electrical voltage in a circuit or electrical device. They are commonly used for safety purposes to ensure that electrical systems are de-energised before maintenance or repair work. Voltage testers are available in both contact and non-contact versions, with non-contact testers being the most commonly used due to their ease of use and added safety benefits.
How to Use a Multifunction Tester
Using a multifunction tester requires a good understanding of electrical testing procedures and safety practices. Here are the basic steps for using a multifunction tester:
1. Familiarise Yourself with the Tester: Before using a multifunction tester, take the time to read the user manual and become familiar with its features and functions. Ensure that the tester is in good working condition and that all necessary accessories, such as test leads, are properly connected.
2. Follow Safety Precautions: Always follow safety guidelines when working with electrical systems. Make sure to wear appropriate personal protective equipment (PPE) and to de-energise the circuit or equipment you will be testing, unless it is absolutely necessary for the system to be live.
3. Select the Correct Test: Choose the appropriate test based on the type of electrical measurement you need to perform. This could include tests for insulation resistance, continuity, earth loop impedance, or other parameters.
4. Connect the Tester: Connect the test leads of the multifunction tester to the points in the electrical circuit where the measurements will be taken. Ensure that the connections are secure and that there is no risk of the leads coming into contact with live parts.
5. Perform the Test: Follow the instructions provided by the tester to initiate the test. Observe the readings on the tester's display and take note of the results.
6. Interpret the Results: After the test is complete, interpret the results based on the specific parameters you are measuring. Compare the readings to acceptable ranges and standards to determine if the electrical system meets the required criteria.
7. Document the Results: Record the test results, including the measurements and any observations you have made. Proper documentation is important for compliance and for maintaining a record of the electrical system's performance over time.
How to Calibrate a Multifunction Tester
Calibration is a critical aspect of maintaining the accuracy and reliability of a multifunction tester. Regular calibration ensures that the tester provides precise measurements, which is essential for meeting safety standards and regulatory requirements. Here's a step-by-step guide on how to calibrate a multifunction tester:
1. Check the Manufacturer's Guidelines: Start by reviewing the manufacturer's guidelines and recommendations for calibration. The user manual should provide detailed instructions on the calibration process specific to your multifunction tester model.
2. Select a Calibration Standard: Calibration standards are reference devices with known, traceable values. Choose the appropriate calibration standard based on the type of test your multifunction tester will undergo. For example, if calibrating the insulation resistance function, you'll need a standard with a known and stable insulation resistance value.
3. Prepare the Test Environment: Calibration should be performed in a controlled environment to minimise external influences. Ensure that the temperature, humidity, and other environmental conditions are within the specified range for calibration.
4. Connect the Multifunction Tester: Follow the manufacturer's instructions to connect your multifunction tester to the calibration standard. This typically involves attaching the test leads or probes to the standard device.
5. Initiate Calibration Mode: Most modern multifunction testers have a dedicated calibration mode or procedure. Follow the specific steps outlined in the user manual to enter calibration mode.
6. Compare Readings: Once in calibration mode, the multifunction tester will generate readings based on the calibration standard's known values. Compare the readings displayed on the tester to the expected values provided by the calibration standard.
7. Adjust if Necessary: If the readings deviate from the expected values, your multifunction tester may have an adjustment mechanism. Follow the manufacturer's instructions to make precise adjustments to align the readings with the calibration standard.
8. Record Calibration Data: Document the calibration process, including the before and after readings, any adjustments made, and the date of calibration. This documentation is essential for maintaining a calibration history for your multifunction tester.
9. Verify Calibration: After calibration, perform a verification step to ensure the accuracy of the adjusted readings. This may involve rechecking the readings against the calibration standard.
10. Calibration Certificate: Once calibration is successfully completed, the multifunction tester should ideally generate
Related links
- Multifunction Testers
- A Complete Guide to PAT Testing
- Loop & RCD Testers
- Fluke Multifunction Testers
- Fluke T6-600 Electrical Tester
- Metrel MI-3125 Electrical Tester Earth Resistance Measurement
- Gossen Metrawatt M699B Electrical Tester, 4 → 24V With Bluetooth
- Fluke 1664 UK FTT Electrical Installation Tester Bundle, 50V
